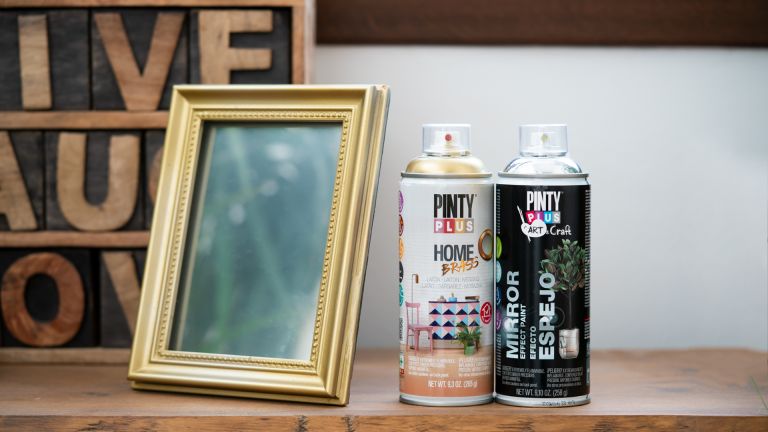
Buying a can of reflective spray paint is the easy part. Knowing how to use mirror effect paint properly is what actually decides whether your project looks like a polished mirror or a smudged mess. Most beginners get frustrated on their first attempt simply because they rush the process.
This guide walks through the basics in plain, simple steps. Nothing complicated, just the practical things you need to know before your first attempt, and a few pointers to keep in mind while you work.
Before You Even Open the Can
Pick your workspace carefully. A garage, an open balcony, or a well-ventilated room away from bedrooms works best. The fumes from spray paint can be strong, so fresh air matters, especially if you are working indoors during Pakistan’s hot summer months when windows are often kept closed for air conditioning.
Lay down old newspaper or a plastic sheet to protect the floor. Overspray travels further than people expect, and cleaning paint off a tiled floor is far more annoying than covering it beforehand.
Gather everything you need before you start: the paint, a clean cloth, fine sandpaper, a primer if the surface needs one, and something to prop your object on so you are not holding it directly while spraying.
Step One: Prepare the Surface
Clean the object thoroughly. Dust, oil from fingers, or old grime will all sit under the paint and ruin the reflection. A simple wipe with a damp cloth, followed by a dry one, usually does the job.
If the surface is rough or has old paint on it, a light sanding helps. You are not trying to strip it completely, just smooth it out enough that the new coats have an even base to sit on.
Let the surface dry completely before moving to the next step. Painting over even slight dampness is one of the most common reasons people end up with a cloudy or bubbled finish.
Step Two: Apply a Base Coat if Needed
Depending on the surface, a base coat, usually black or dark grey, can help the reflective layer look sharper. This is especially useful on porous surfaces like wood, which tend to absorb the first layers unevenly without a base coat underneath.
Let the base coat dry fully. Rushing here means the mirror layer on top will not bond properly, and the shine will look patchy once it dries.
Step Three: Apply the Mirror Coats
Shake the can well before you start, and keep shaking it occasionally between coats. This keeps the reflective particles evenly mixed instead of settling at the bottom.
Hold the can at a steady distance from the surface, roughly the length of your hand and forearm. Spray in smooth, sweeping motions rather than stopping in one spot. Stopping too long in one place is what causes drips and uneven patches.
Apply thin layers. It is far better to do four or five light coats than two heavy ones. Each thin coat should be allowed to dry before the next goes on, even if that means waiting a while between rounds.
Step Four: Let It Cure Properly
Once the final coat looks even, resist the urge to touch or move the object right away. Surface drying and full curing are two different things. The surface might feel dry within an hour, but the deeper layers can take a day or two to fully set.
Keep the piece somewhere flat, dust-free, and undisturbed while it cures. Moving it too early, even gently, can leave marks or smudges in the still-soft layers underneath.
A Few Things That Trip Up Beginners
Spraying in humid weather is one of the biggest culprits behind a poor finish. Moisture in the air slows drying and can leave the surface looking hazy instead of clear. Choosing a dry day, or using a fan for gentle airflow, usually solves this.
Another common issue is impatience between coats. Adding a new layer before the previous one has properly dried often causes wrinkling or an uneven texture. It feels slow, but waiting really does pay off in the final look.
Lastly, people often forget to test on a small hidden spot first. Different materials react differently, and a quick test saves you from ruining an entire piece if the paint does not behave as expected on that particular surface.
Basic Safety Habits Worth Keeping
Wear a simple mask, especially if you are spraying indoors or in a small room. The fumes are not something you want to breathe in for long stretches, and a basic dust mask or fabric mask offers some protection while you work.
Keep the area away from children and pets while spraying and while the piece dries. Curious hands and paws have a way of finding wet paint at exactly the wrong moment.
If you get paint on your skin, wipe it off quickly with a cloth before it dries. Once it sets, it becomes much harder to remove and may need a solvent to clean off properly.
Practising on Small Objects First
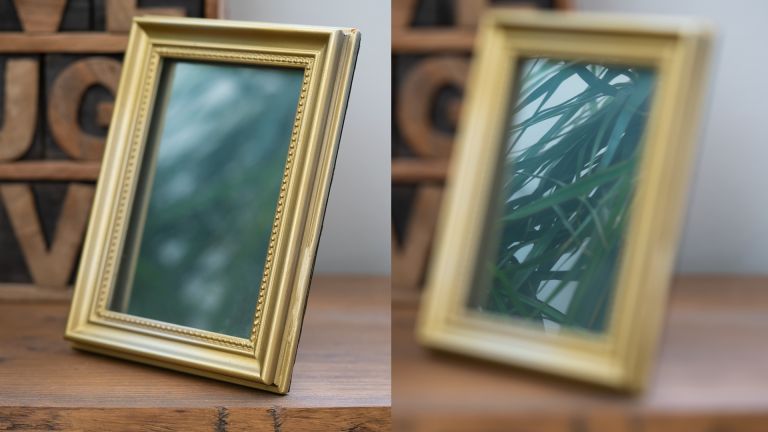
If this is your first time using mirror effect paint, start small. A photo frame, a plastic bottle, or an old jewellery box makes a good practice piece. These smaller objects are easier to turn and coat evenly, and mistakes on them cost far less than ruining a large piece of furniture.
Once you feel comfortable with the spray distance, coat thickness, and drying rhythm on a small object, moving on to bigger furniture pieces feels much less risky. Most people find their third or fourth attempt looks noticeably better than their first, simply because the technique becomes more natural with practice.
Final Word
Once you understand the basic rhythm, prepare, apply thin coats, wait, repeat, using mirror effect paint becomes far less intimidating. It rewards patience more than skill. Take your time on the first project, and you will likely find the second and third attempts come together much faster and with a noticeably better shine.