Introduction
There is something deeply appealing about furniture that looks like it has a history. The soft, worn edges of a cabinet that has been in a family for generations, the subtle colour shifts of a chair that has faded gracefully in sunlight, the honest imperfections of a surface that has been used and loved over time. The chalk paint vintage look captures all of this — and you do not need to wait decades or hunt through antique markets to achieve it.
With the right techniques, chalk paint allows you to create a genuinely convincing vintage aesthetic on any piece of furniture, whether it is an old find or something brand new. This guide covers the methods that consistently produce the best results.
Understanding What Makes Something Look Vintage
Before picking up a brush, it helps to understand what visual qualities actually read as vintage or aged. Genuine aged furniture typically shows colour that is slightly faded or uneven, paint that has worn away at high-contact edges, subtle layering where different finishes show through in places, and a surface texture that is soft and matte rather than plastic and shiny.
Each of these qualities can be deliberately created with chalk paint through a combination of colour choice, layering technique, distressing, and the right finishing products. The goal is not to make something look broken or neglected — it is to create the impression of graceful, natural ageing.
Choosing the Right Colours for a Vintage Effect
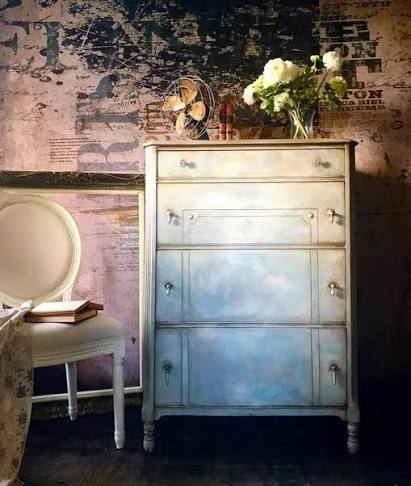
Colour choice is the first and arguably most important decision. Genuine vintage pieces tend to feature colours that have faded slightly from their original intensity — dusty blues, chalky whites, sage greens, soft greys, aged creams, and muted terracottas all read as authentically old.
Highly saturated, bright colours tend to look modern and new regardless of how they are applied. If your chalk paint brand offers a range of heritage or chalky tones rather than vivid contemporary shades, those are the ones to reach for when going for a vintage feel.
The most effective vintage results often use two colours — a base layer and a top layer — where the base is allowed to show through in places. A warm cream base under a dusty grey top coat, for example, creates an aged layered quality that a single coat simply cannot replicate.
The Two-Colour Layering Technique
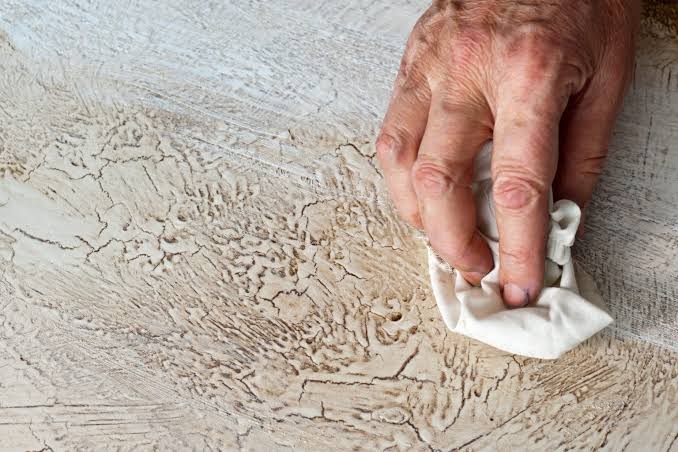
Apply your base colour first and allow it to dry fully. Then apply your top colour in a slightly thinner coat than usual — you want it to cover most of the surface but not completely obscure the base. While the top coat is still slightly damp, take a slightly damp cloth or brush and gently blend or pull the paint in some areas to create subtle variations in coverage.
Once fully dry, the two-layer surface already has a depth and complexity that single-coat painting cannot achieve. The variation in the top coat creates the subtle unevenness that is characteristic of genuinely aged surfaces.
Distressing for Authentic Worn Edges
Distressing is the technique of physically removing small amounts of dried chalk paint to reveal the layer beneath, mimicking the natural wear patterns that genuine old furniture develops over years of use. Done well, it is one of the most convincing ways to achieve the chalk paint vintage look.
The key to convincing distressing is thinking about where furniture actually wears in real life — edges, corners, areas around handles and knobs, the tops of legs, spots where hands regularly grip or surfaces are frequently touched. These are the places to concentrate your distressing work.
Use fine sandpaper (220 grit) and work with very light pressure in the areas you have identified. The goal is to reveal the layer beneath — either the base coat colour or the bare wood — in a way that looks natural rather than uniformly sanded. Work gradually and check the result frequently. You can always remove more paint, but you cannot put it back without repainting.
Dark Wax for Antique Depth
Clear wax produces a soft, natural finish that protects without changing the colour significantly. Dark wax does something much more dramatic — it adds a brown, amber, or sepia tone to the surface that visually ages it and adds a rich depth to the finish.
Apply dark wax sparingly over dried, distressed chalk paint using a wax brush or cloth. Work it into corners, recesses, carved details, and any areas where you want to emphasise shadow and depth. Then use a clean cloth to remove the excess from flat surfaces, leaving the darker tone concentrated in the areas where genuine grime and age would naturally accumulate.
The result, when done carefully, is a piece that looks genuinely old in a way that is difficult to distinguish from authentic aged furniture.
Layering and Dry Brushing for Texture
Dry brushing is a technique borrowed from fine art painting that works beautifully in furniture finishing. Load a brush very lightly with paint — barely any paint at all — and drag it quickly across the surface in long strokes. The almost-dry brush deposits tiny amounts of paint on the raised texture of the surface while leaving the recesses untouched.
This creates a highlighted, worn effect where the tops of the wood grain texture pick up a lighter colour while the grain itself remains the darker base colour. It is subtle but adds considerable realism to a vintage finish.
Final Sealing
Once you are satisfied with the vintage effect, seal the piece with clear wax or a matte water-based topcoat. Avoid gloss sealants for vintage projects — a shiny finish immediately reads as modern and undermines all the distressing work you have done. Matte or satin finishes preserve the aged, soft quality of the chalk paint vintage look.
Conclusion
The chalk paint vintage look is one of those finishes that rewards patience and attention to detail. Each technique builds on the last — layering creates depth, distressing creates wear, dark wax creates age, and dry brushing creates texture. You do not need to use all of them on every project, but understanding how they work together gives you the flexibility to create exactly the level of aged authenticity you are looking for.