There is a specific rhythm to getting a proper reflective shine with paint. It is less about the exact product you use and more about how you layer, wait, and finish each coat. Once you understand how to get a mirror finish with paint, the whole process starts to feel much more predictable, rather than a hit-or-miss experiment every time.
This blog focuses purely on technique, the actual hands-on habits that separate a cloudy, disappointing result from a clean, sharp reflection.
It Starts With a Flawless Base
Reflection depends on flatness. Any bump, scratch, or rough patch on the base surface will show through the final coat, sometimes even more visibly once light bounces off it. This is why sanding is not a step to rush through.
Use progressively finer sandpaper, starting rougher to smooth out major imperfections, then moving to a finer grit for a polished, even surface. Wipe away all dust between grits, since leftover particles can scratch the surface as you continue sanding.
The Role of a Primer or Base Coat
A dark, smooth base coat, often black, is commonly used before the reflective layer. This dark base helps the reflective particles in the top coat stand out more, since light has less competing colour to bounce off underneath.
Apply the base coat evenly and let it dry fully. Any unevenness here will carry through into the final layers, so treat this step with the same care as the reflective coats themselves.
Layering: The Real Secret
The reflective quality builds up gradually, layer by layer. The first coat often looks faint, almost disappointing. This is normal and expected, not a sign of a bad product. Each following coat adds to the reflectiveness, gradually sharpening the shine.
Keep each coat thin. A thick, heavy coat might look impressive wet, but it usually dries unevenly, with drips or a cloudy texture. Thin coats, even if it means applying five or six instead of two, consistently give a better final result.
Wait for each coat to dry before applying the next, not just until it looks dry, but until it actually is. Touching a coat too early, even lightly, can smear the reflective particles and ruin the evenness you have built up so far.
Keeping Your Distance and Motion Consistent
Hold the can at a steady, consistent distance throughout each pass, roughly the length of your forearm. Moving closer in some spots and further in others creates uneven thickness, which shows up clearly once the piece is finished.
Move in smooth, steady sweeps rather than stopping and starting. Pausing in one spot, even briefly, causes paint to build up unevenly right at that point, which often becomes a visible flaw in the final reflection.
The Curing Stage Matters More Than People Think
Once the final coat is applied and looks good, resist the urge to test the reflection by touching or moving the piece too soon. Curing time, when the deeper layers fully harden, is often longer than surface drying time.
Leave the piece flat, undisturbed, and away from dust for the full recommended curing period. Rushing this stage is one of the most common reasons a seemingly perfect finish ends up scratched or smudged within days.
Buffing for an Extra Sharp Shine
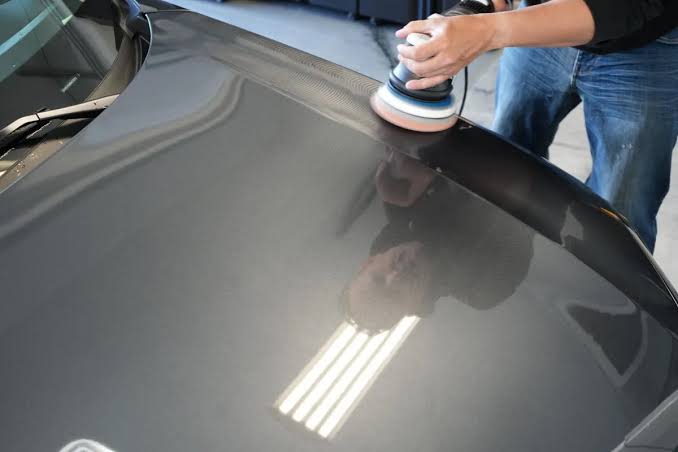
Once fully cured, some people gently buff the surface with a very soft, dry cloth to enhance the shine further. This should be done lightly, with minimal pressure, since aggressive buffing can actually dull or scratch a reflective finish rather than improve it.
This step is optional and works best on finishes specifically designed to be buffed. Always check whether your particular paint supports this before attempting it, since not every formula responds well to buffing.
Fixing an Uneven Finish
If the final result looks patchy or cloudy in certain spots, a light sanding of just the problem area, followed by a fresh thin coat, can often fix it without needing to redo the entire piece. This works best while the overall finish is still relatively fresh, rather than after months of use.
For larger issues, sometimes starting over on that section, sanding back to the base coat, is the more reliable fix, even though it takes more time than a quick touch-up.
Checking Your Work Under Good Light
Work in a well-lit space, ideally with natural daylight if possible. Dim lighting hides thin patches and uneven coverage, which only become obvious later once the piece is moved into brighter light. Stepping back and looking at the surface from a slight angle, rather than straight on, often reveals unevenness that is hard to spot up close.
It helps to pause between coats and check the surface from a few different angles before deciding whether another layer is needed. What looks finished under one light source can look noticeably different under another, so a quick check in daylight, if you have been working indoors, is a good habit.
Why Patience Beats Speed Every Time
It is tempting to rush toward the finished shine, especially once the first couple of coats start looking promising. But the biggest difference between an average result and a genuinely impressive one usually comes down to how much patience was applied in those final stages, not the first ones.
Give yourself more time than you think you need, both between coats and before the final curing period ends. A project that takes an extra day but comes out looking properly reflective is always a better outcome than a rushed one that needs redoing from scratch.
Final Thoughts
Getting a genuine mirror finish with paint really comes down to discipline more than any special trick. Flat, well-prepared surfaces, thin patient layers, consistent spraying distance, and proper curing time all add up to a result that actually reflects light the way you want it to. Skip any one of these steps, and the shine usually falls short. Follow them carefully, and even a first attempt can turn out surpris