Have you ever looked at your old fridge or washer and wished it could look brand new? Appliance touch up paint offers a simple solution. This paint can transform worn-out appliances into fresh-looking ones with minimal effort. Many people worry about the effectiveness of touch-up paint. They also question how easy it is to apply. Fortunately, you will find that using appliance touch up paint is straightforward and rewarding.
Benefits of Touch-Up Paint
Cost-Effectiveness
Using appliance touch up paint is a smart way to make old appliances look new without spending too much money. Here are some reasons why it is a good choice:
- Affordable Alternative: Instead of paying a lot for new appliances, you can get a similar look for less. A small can of touch-up paint can hide scratches and chips, making your fridge or washer look brand new.
- Saves Money on Repairs: Many people pay a lot for repairs when their appliances get old. With touch-up paint, you can fix small problems yourself and save money on repair costs.
- Increases Appliance Lifespan: Keeping your appliances looking good can help stop rust and corrosion. This easy step can make your appliances last longer, saving you more money over time.
Ease of Use
Applying appliance touch up paint is not just cheap but also very easy. You don’t need to be an expert to get great results. Here’s why it is user-friendly:
- Simple Application: Most touch-up paints have clear instructions. You can use a brush or spray can, based on what you like. This lets you pick the method that feels best for you.
- Quick Transformation: You can finish the job in just a few hours. After a little prep, you can paint your appliance and see quick results. The change can be so amazing that you might not recognize your old fridge or washer!
- Minimal Tools Required: You won’t need much equipment. A clean cloth, painter’s tape, and the touch-up paint are usually all you need. This makes it easy for everyone to do.
Types of Appliance Touch Up Paint
Spray Paint Options
Spray paint is a fast and easy way to use appliance touch up paint. It helps you cover big areas evenly and gives a smooth look. Here are some common spray paint choices:
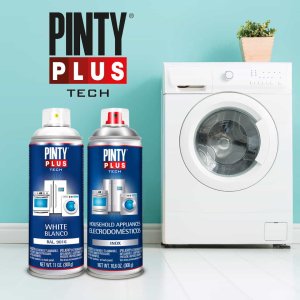
- Appliance Repair Paint: This spray paint is made just for appliances. It sticks well to metal and doesn’t chip easily. You can find it in many colors to match your appliance.
- White Appliance Coating: If your fridge or washer is white, this spray paint can bring back its shine. It covers well and dries fast, which is great for quick fixes.
Tip: When using spray paint, always work in a place with good air flow. Wear a mask to avoid breathing in fumes.
Brush-On Paint Options
Brush-on paint gives you better control when applying. It is great for small areas or detailed fixes. Think about these choices:
- Fridge Scratch Repair Paint: This paint is great for fixing scratches on your fridge. It comes in a small bottle with a brush, so you can easily target specific spots.
- Appliance Touch Up Paint: This flexible option works on many appliances. It comes in different colors and finishes, so you can find the right match for your appliance.
Note: When using brush-on paint, make sure to apply thin layers. This helps stop drips and gives a smooth finish.
Specialty Paints
Specialty paints meet special needs. For example, some paints can handle high heat, making them good for ovens or stoves. Others may have a textured look for a modern style.
Alert: Always check the label to make sure the paint is right for your appliance type.
By picking the right kind of appliance touch up paint, you can get a professional-looking finish that gives new life to your old appliances.
Application Process for Appliance Touch Up Paint
Preparation Steps
Before you start painting, proper preparation is key to achieving great results. Follow these steps to get ready:
- Clean the Surface: Use a mild detergent and water to clean the appliance. Remove any dirt, grease, or grime. This helps the paint stick better.
- Dry Thoroughly: After cleaning, dry the surface completely with a clean cloth. Any moisture can affect the paint’s adhesion.
- Sand the Area: Lightly sand the damaged area with fine-grit sandpaper. This creates a rough surface for the paint to adhere to. Wipe away any dust with a damp cloth.
- Tape Off Surrounding Areas: Use painter’s tape to cover areas you don’t want to paint. This prevents accidental overspray or brush strokes on adjacent surfaces.
Tip: Make sure to work in a well-ventilated area. Good airflow helps with drying and reduces fumes.
Painting Techniques
Now that you are prepared, it’s time to apply the appliance touch up paint. Here are some techniques to consider:
- Spray Painting: If you choose spray paint, hold the can about 6-12 inches away from the surface. Use smooth, even strokes to cover the area. Start spraying off the edge of the appliance and move across to avoid drips.
- Brush-On Painting: For brush-on paint, dip the brush into the paint and remove excess. Apply thin layers, starting from the edges and moving inward. This helps avoid visible brush strokes.
- Layering: If the first coat doesn’t fully cover the area, wait for it to dry completely before applying a second coat. This ensures a smooth and even finish.
Note: Always read the instructions on the paint can. Different products may have specific application guidelines.
Drying Tips
After painting, proper drying is essential for a durable finish. Here’s how to ensure your paint dries correctly:
- Allow Adequate Drying Time: Follow the manufacturer’s recommendations for drying times. Generally, you should let the paint dry for at least 24 hours before using the appliance.
- Avoid Humidity: High humidity can slow down the drying process. If possible, paint on a dry day or use a dehumidifier in the area.
- Check for Touch-Ups: Once the paint is dry, inspect the area. If you see any imperfections, lightly sand the area and apply another coat.
Alert: Avoid using the appliance until the paint is fully cured. This ensures the best results and longevity of your touch-up work.
By following these steps, you can effectively apply appliance touch up paint and restore your old fridge or washer to its former glory.
Maintenance for Painted Appliances
Cleaning Recommendations
To keep your painted appliances looking good, use these cleaning tips:
- Use Gentle Cleaners: Pick mild dish soap mixed with warm water. Stay away from strong chemicals that can harm the paint.
- Soft Cloths Only: Use a soft microfiber cloth for cleaning. This stops scratches and keeps the paint’s finish nice.
- Spot Clean Regularly: Wipe down your appliances every week to get rid of dust and spills. This easy step helps keep them looking nice.
Tip: Always try any cleaner on a small, hidden area first. This makes sure it won’t hurt the paint.
Long-Term Care
Taking care of your painted appliances helps them last longer and stay looking new. Here are some tips:
- Avoid Abrasive Tools: Never use steel wool or rough sponges. These can scratch the surface and damage the paint.
- Monitor for Damage: Check often for chips or scratches. If you see any, touch them up quickly with appliance touch up paint. This stops rust and more damage.
- Keep Away from Heat: Place your appliances away from direct heat sources. High temperatures can make the paint peel or fade.
Alert: If you need to repaint, make sure the surface is clean and dry before putting on new paint. This helps it stick better and gives a smoother finish.
By following these cleaning and maintenance tips, you can enjoy your freshly painted appliances for many years. Regular care not only improves their look but also protects your investment.
Using appliance touch up paint has many advantages for your old fridges and washers. You can save money and get a new look. The process is easy, so anyone can do it. With just a few supplies, you can change your appliances quickly.
Tip: Taking care of your painted surfaces will keep them looking good for years.
Think about this simple way to improve how your appliances look. You will love the results and make your investments last longer.